| |
Recruitment
Recruitment is for Hiring of new employees in an Organisation from the selection stage,interview,shortlisting and finally employment.
Steps on how this is done is explained on the righside Panel
The whole process is also illustrated in the demo video below.
STEP ONE: RECRUITMENT POST FIGURES
Figure 1.1.1 Adding a new Recruitment

STEP TWO: APPLICANTS LIST FIGURES
Figure 1.2 Registering Panelists of an Interview
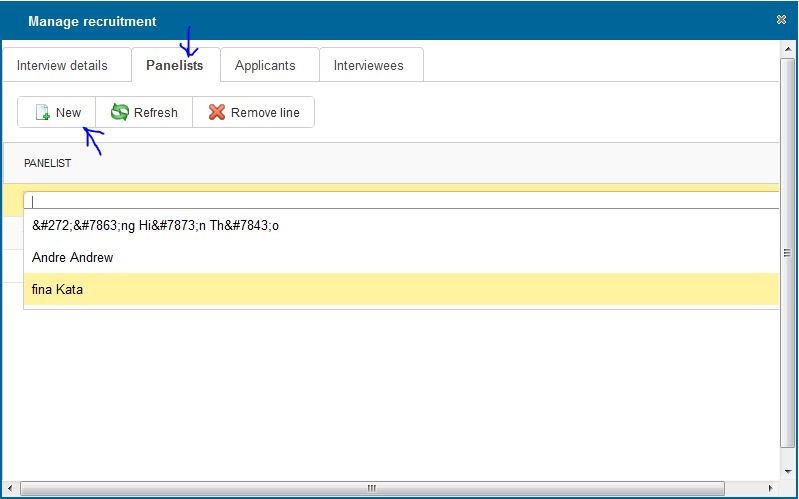
Figure 1.3 Registering an Applicant
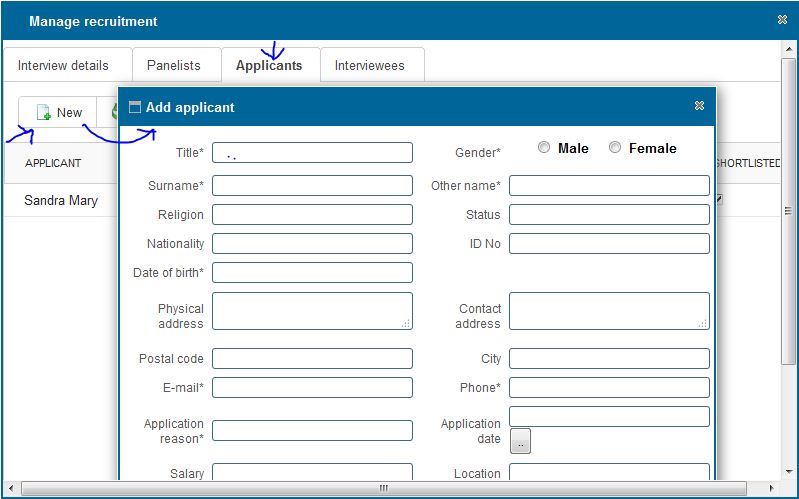
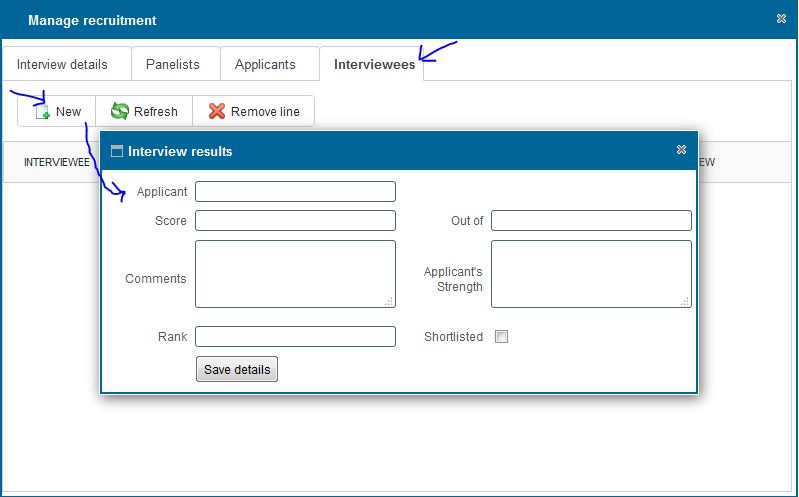
Figure 1.4 Capturing the Interview Results
|
STEP ONE:-RECRUITMENT POST STEPS
Adding a new recruitment
- You can add a new recruit by clicking on the new button on the toolbar
- On click a dialog box appears as show in Figure 1.1
- On the Date field,enter the date of recruitment
- On the Post field,select the post you wish to register for recruitment
-
After entering the data.Click on save button to Save.
Viewing Recruitment Post
- You can view all registered recruitments by clicking the 'Recruitment' option on the rightside menu
Searching a Recruitment
- You can search a Recruitment Post by typing the search criteria on the text field on top of the Post Column.
Deleting a recruitment post
- Select the row containing the Recruitment post you wish to delete by clicking on it.
- Click on the delete button to delete the selected post.
- When confirmation Window Appears,click "Ok" if you wish to continue deleting or "Cancel" to stop the delete operation.
Printing recruitment post(s) list
- Click on the print icon,a dropdown menu appears with two options.
Pdf
- This option prints/generates a Pdf document
Xls
- This option prints/generates an Excel/Spreadsheet document
Searching Particular Post.
- You can search a Recruitment Post by typing the search criteria on the text field on top of the Post Column.
STEP TWO:-APPLICANTS REGISTRATION STEPS
Registering an Interview for a particular post
- Double click the post you wish to register an interview by double clicking on it
- A pop up window a shown in Figure 1.3 appears showing the Post you have selected an the date for the interview on the 'Interview details' tab.
Registering the Panelists for an interview
- Click on the Panelist tab of the 'Add applicant' Pop up Window so that the contents as shown in Figure 1.4 appears.
-
To add a Panelist Click on the new Button.
An empty row is added on the window/Grid.Click on the added empty row to display a list of all registered employees.
-
Add a panelist by selecting the person from a list of all registered employees and press Enter.
Registering an Applicant.
-
To register an new applicant,click on the applicants tab.
-
Click on new icon;a pop up window as shown in Figure 1.5 appears.Enter the applicants details in the form and click on Submit.
-
If the applicant is qualified to attend the interview,make sure you check the 'Shortlisted' check box on the applicants registration form so that he/she might appear in the interviewees list.
Capturing Interview Results
-
To register interview results,click on interviewees tab.
You will view the existing interview results.
-
To add the results click the new Icon.On the Pop up Form that appears select the interviewee you wish to capture details for using the dropdown menu.
NB:Only the applicants who were checked in the 'Shortlisted' Checkbox in the 'Add Applicant' form will appear in the 'applicants' dropdown menu in the 'Interview Results' form.
-
If the Interviewee has qualified,make sure you tick the 'Shortlisted' Checbox in the interview Results checkbox so that the applicant can be registered as an Employee of the company.
|